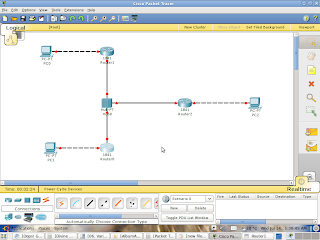
Networking students and Professionals must be familiar with Packet Tracer.. For others, Packet Tracer is basically a simulator software which can be used to simulate a Router/Switch/Hub or any other networking device that we use in LAN, WAN connections as a part of networking. With Packet Tracer simulations, it is easy to test and learn configurations that can be done in a networking device.
Packet Tracer was released
by Cisco, a few years back. Packet Tracer is available for all leading operating systems like Windows, Linux, MAC etc.
You can download packet tracer for Windows from here:
For ubuntu, packet tracer is given as a .bin file. You can find the .bin file from the below given link:
To install packet tracer in Ubuntu (Please note you can install any .bin file that you download if you follow these steps.)
Step 1:
Installing Packet Tracer from a .bin file:
copy the PacketTracer53_i386_installer-deb.bin file to Places -> Home
Go to Applications -> Accessories -> Terminal
Type chmod +x PacketTracer53_i386_installer-deb.bin
./PacketTracer53_i386_installer-deb.bin
you will find the software auto extracting. Follow the steps thereby to complete installation. Good!
After installing Packet Tracer, check out whether your fonts are okay. There is a library package conflict with Ubuntu and packet tracer. So, you may have to install the following library package. If not proper, use the following commands in the Terminal Window.
Install this Library first:
(terminal)
sudo apt-get install libqtwebkit2.2-cil libqt4-script libqt4-qt3support libqt4-sql
Edit this in terminal:
sudo gedit /usr/local/PacketTracer5/packettracer
Edit the notepad:
it should look like this --
#!/bin/bash
echo Starting Packet Tracer 5.3
PTDIR=/usr/local/PacketTracer5
#export LD_LIBRARY_PATH=$PTDIR/lib
pushd $PTDIR/bin > /dev/null
./PacketTracer5 $@ > /dev/null 2>&1
popd > /dev/null

Success! Now open Packet Tracer and enjoy the breeze of Networking Simulator, Packet Tracer, Cisco!